Deploying a fine-tuned classifier
Two chapters into the fast.ai course and we are already equipped to deploy a fine-tuned classifier that operates on a close-to-human level task without too much data nor expensive hardware (actually free)!

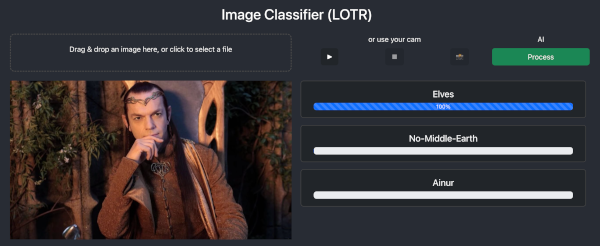
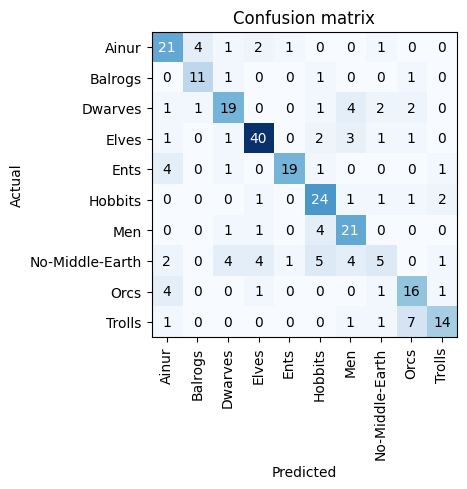
As a pet project I ended up building a LOTR race classifier. It achieves quite good accuracy (75% on my validation set, I felt it did even better during QA) given how much I’m relying on defaults and how little (and dirty) the custom input dataset is.
The process starts with data gathering (using DDG API and some helpers from fast.ai) with ~100 images of each LOTR race. Afterwards a resnet18 model is fine-tuned so that we can check the images that perform the worst and use them to clean up the data further. Once we are happy with the dataset we re-train the model and do the transformations we see fit. Once the fine-tuned model is ready we export and deploy it to HG Spaces. Afterwards we went for a custom solution so we could see how an E2E deployment would look like.
+-------------+    +-------+    +------------+    +--------+
| Gather data |--->| Train |--->| Clean data |--->| Deploy |
+-------------+    +-------+    +------------+    +--------+
                        ^            |
                        +------------+
                           re-train
Data
I’ve had data scientist colleagues mention to me how much of their time went into getting clean data (or structuring corporate data, up to 80%). I’m not working on a production system and still found it tricky to get good-enough data even for my small experiment.
A simplified version of how I gathered the data looks like this:
race_characters = {
    'Ainur': ['Gandalf', 'Saruman', 'Sauron'], # etc..
}

def fetch_images_for_race():
    for race, characters in race_characters.items():
        folder = f"./{race}"
        for character in characters:
            results = DDGS().images(
                keywords=f"{character} lotr movie face" if race != 'no-middle-earth' else f"{character} face",
                type_image="photo",
                max_results=50,
            )
            download_images(folder, urls=results) # this is a fast.ai utility function
First model
Training and cleaning the dataset is well covered in the second chapter of the fast.ai course although I’ll share some issues encountered on the way:

-
Duplicate images: I realised quite a few of the images I was downloading were duplicates -
Using a non-structured dataset: searching the web for images implies a huge bias on what kind of results you would get and how accurate it is. I had to adjust my queries multiple times until I liked enough the shape of the data. -
Cleaning data: fast.ai provides a very limited utility to clean-up your training/validation image datasets. It’s not optimised for quick cleanup and is lacking essential features to enable a quicker process. I feel that at this stage looking manually at the pictures and/or relying on other automated software would have been quicker. -
Remote environment: using Kaggle is a huge enabler for me since my Mac doesn’t come with a GPU but I find it more comfortable to run most of my code locally and only rely on it when I get to using the GPU. That becomes a problem when some operations (like cleaning up the data) depend on previously training your model. -
Kaggle notebook: fast.ai chapters notebooks were done a while ago and some packages like DDG have evolved and the actual Kaggle environment has changed so there was some manual intervention needed in the actual code or setup. That’s OK for tech-savvy people but could be a blocker for people with less ops experience. -
Deployment: deploying to a personal Space in Hugging Face worked as well but I also had to adjust the Gradio sample code I read. Same happened for some configurations I had to add for HG deployments to work.
Custom solution
The Gradio & Hugging Face Space deployment worked well but I wanted to have a custom deployment to get an E2E feeling of a simple release.
I already had a working Jekyll deployment (this site) so I decided to include a React application inside where I could communicate with a Backend for inference.
I started trying to integrate the HF Space JS client into React but sadly it didn’t work. The prediction code would be as simple as:
const response = await fetch("https://raw.githubusercontent.com/gradio-app/gradio/main/test/test_files/bus.png");
const exampleImage = await response.blob();

const client = await Client.connect("sgerov/lotr-races");
const result = await client.predict("/predict", {
				img: exampleImage,
});
Next I went for the manual endpoint integration but I wasn’t getting the right events from the $URL/call/$API_NAME/$EVENT_ID regardless of how I formatted the request.
This is the point where I decided to go for a custom solution which is something I wanted to try out anyway. I went for the least resistance path that came to mind which was to rely on a very slim Django app that relies on fast.ai library for inferences:
 +--------+ html .---------. base64 image  +------------+
 |        |----->|         |-------------->| Django App |
 | Jekyll |      | Browser |<--------------| .--------. |
 +--------+      +---------+    prediction | |fast.ai | |
     ^          / /       \ \              | .--------. |
     |         '-------------'             +------------+
     |JS                                         ^
     |                                           |model.pkl
+-----------+                            +-----------------+
| React APP |                            | Kaggle training |
+-----------+                            +-----------------+
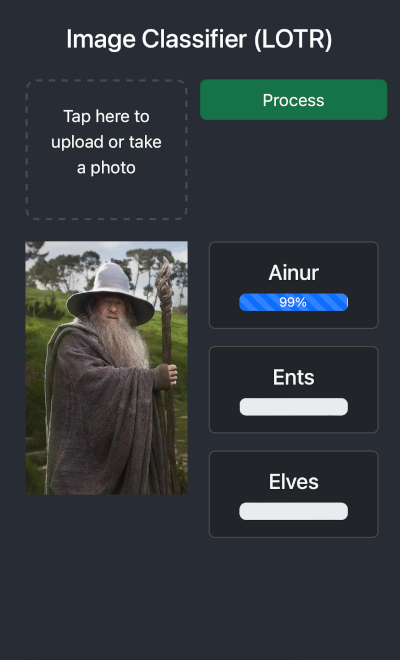
A great side-effect of a custom solution is that it was rather trivial to make a mobile-friendly version of the app which might enable some interesting model experiments later on.
The Django endpoint, aside of the glueing code given by the framework is almost as simple as:
model = load_learner('model.pkl')
image_base64 = data.get('image')
img = PILImage.create(file_from_image_base64.name)

_, _, outputs = model.predict(img)

result = {
    'predictions': dict(zip(model.dls.vocab, map(float, outputs))),
}
return JsonResponse(result)
Next steps

Now that there is some backbone and we got some experience deploying simple models we should be all set to experiment with fast.ai configurations, input data, different architectures and datasets while digging into deep learning.
Some immediately useful community contributions that come to mind are:
- Improve the Image Classifier Cleaner to add additional features that could speed up dramatically the data cleaning process
- Create a new widget to enable quicker feedback loops and labeling while downloading data from platforms like DDG
- Improve course notebooks (there are already open PRs handling this on fast.ai)
Useful links
Enjoy Reading This Article?
Here are some more articles you might like to read next: